How to Set Up a Mi 360° Home Security Camera in Kenya: Wi-Fi, App, Placement and Power Cuts
You have bought a Mi 360° home security camera, and you want it working properly, not half-working. A well-set-up camera shows a clear picture, sends alerts that matter, records reliably and survives power cuts and weak Wi-Fi. A badly set-up one drops offline, floods your phone with false alarms and misses the one moment you needed it.
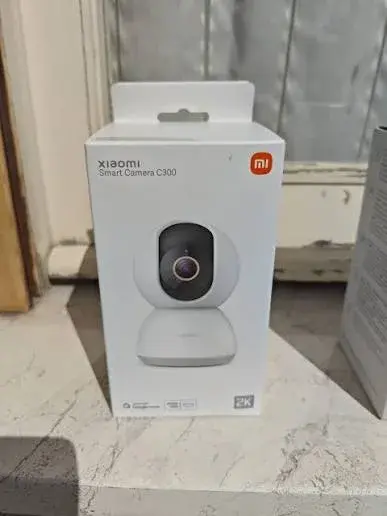
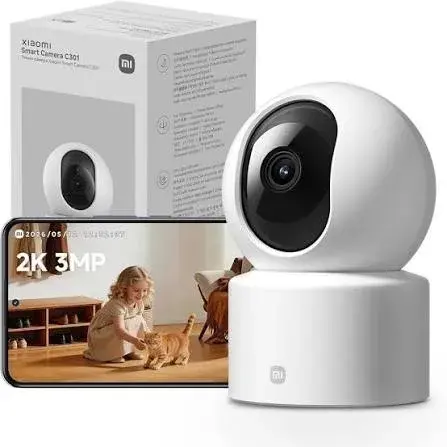
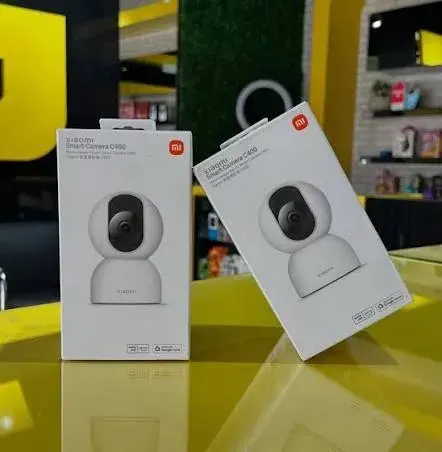
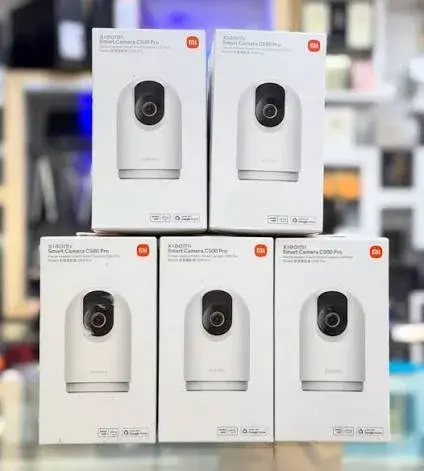
This guide, from the team at City Gadgets Kenya in Nairobi, walks you through setting up a Xiaomi Mi 360° camera at home or in a small shop in Kenya. It applies to the C201, C300, C301, C400 and C500 Pro, which share the same basic set-up. We cover what to prepare, the step-by-step setup with the Xiaomi Home app, where to put the camera, how to tune night vision, detection and alerts, how to survive power cuts and weak Wi-Fi, and how to fix common problems.
Exact menu names in the app change with software updates, so we describe the steps in plain words. If anything on your screen looks different, the general approach still applies, and our team can help by phone on 0745 575 931.
If you have not chosen a camera yet, read our buying guide first.
Part 1: Before you start
What you need
- The camera and its power supply. The plug on the adapter depends on the market, and Kenyan sockets use the British three-pin style, so check the fit, or use a proper adapter. The power adapter is not listed as included for some models, so confirm with your seller.
- A microSD card, from 8 GB to 256 GB, sold separately. Use a good-quality card marked for video.
- A smartphone with the Xiaomi Home (Mi Home) app.
- Your home Wi-Fi name and password.
- A strong Wi-Fi signal where the camera will sit.
- A surge-protected extension.
Check the Wi-Fi first
Stand where you plan to put the camera, and check your phone's Wi-Fi signal. If it shows a weak signal there, the camera will struggle. Improve the signal before setup, by moving the router, adding an extender or using a mesh system. Do not skip this step. Most camera problems are Wi-Fi problems.
Which band?
Some models connect to 2.4 GHz only, and others support both 2.4 GHz and 5 GHz. The C400 and C500 Pro publish dual-band support. For the others, the bands are not stated in the specifications we read, so we confirm. During setup, your phone should be on the same Wi-Fi band the camera will use, which for many cameras is 2.4 GHz. If your router merges both bands under one name, setup can be confusing, and temporarily turning off 5 GHz, or giving each band its own name, often solves it.
Prepare your account
You need a Xiaomi account to use the app. Create it with an email address you control, a strong and unique password, and turn on any extra security the app offers. Keep your recovery details up to date.
Part 2: Step-by-step setup
- Insert the memory card first. With the camera unplugged, find the card slot and insert the microSD card. Some cards need formatting afterwards, which the app can do.
- Plug in the camera near the router for the first setup. Use the supplied adapter and cable. Wait for the camera to start. Many models give a voice prompt or an indicator light.
- Install the Xiaomi Home app from your phone's app store, and sign in with your Xiaomi account.
- Choose the correct region and server if the app asks. Pick a setting that matches where you actually are.
- Add the camera. In the app, choose to add a device, and follow the prompts. Some models ask you to scan a code on the base of the camera.
- Connect to Wi-Fi. Select your network, enter the password carefully and wait for the camera to connect. A wrong password is the most common reason for failure.
- Name the camera by room, such as "Living room" or "Nursery", and set your time zone.
- Format the memory card if the app says it is needed. This erases the card, so use a new card.
- Check for a software update, and install it.
- Test the picture, the rotation, night mode and the audio.
- Turn on detection and alerts that you want. On some models, human detection and tracking are off by default.
- Move the camera to its final position, and check the Wi-Fi signal and the view again.
If setup fails, restart the camera and the router, check that your phone is on the right Wi-Fi band, reset the camera using its reset button or procedure in the manual, and try again.
Part 3: Where to put the camera
Placement matters as much as the camera itself.
General rules
- Cover the entrances and the valuable areas. A door, a window, a safe or a shop counter.
- Place the camera high, on a shelf or ceiling, so it sees more and is harder to reach.
- Avoid pointing straight at a window. Bright light from outside blinds the sensor, and at night the infrared bounces off the glass.
- Avoid shiny walls and mirrors, which reflect infrared light.
- Keep it within good Wi-Fi range.
- Keep it away from steam, since the manufacturer advises avoiding humid environments for some models.
- Keep the cable out of reach of children and pets.
- Do not hide the camera from people it records. Visible cameras are fairer and are often more effective at deterring theft.
Room by room
| Room | Suggested position | Care |
|---|---|---|
| Living room | A shelf in a corner, high up, facing the room and the door | Avoid direct window glare |
| Nursery | Out of the child's reach, high, with a clear view of the cot | Keep cables away from the cot |
| Front door area | Inside, facing the door | Do not point at a glass door at night |
| Kitchen | Away from the stove and steam | Humidity can damage electronics |
| Shop or salon | High near the entrance, covering the counter | Respect customers and staff |
| Home office | Facing the door and the equipment | Check Wi-Fi strength |
| Pet area | High and out of reach | Pets chew cables |
Mounting
The camera can sit on a flat surface or be mounted upside down from a ceiling. For a ceiling mount, you rotate the image in the app. A screw-in base is included with some models. Make sure the mounting is secure, since a falling camera can break.
Part 4: Tuning the camera
Picture quality
In the app, choose the quality setting that suits your connection. Higher quality looks sharper but needs a stronger connection. If the picture stutters, lower the quality. You can set a lower quality for remote viewing and keep a higher quality for recording.
Night vision
Night vision uses infrared light and is usually black and white. A few tips:
- Keep the lens clean. Dust and fingerprints blur night pictures.
- Do not place the camera behind glass.
- Check the view at night, not just in the day.
- Use the low-light colour modes where they are offered, but expect black and white in complete darkness.
- On the C400, the infrared has no visible red glow, which is helpful in bedrooms.
Detection and alerts
Detection decides when the camera tells you about something.
- Turn on human detection to reduce false alarms from shadows and pets.
- Set the detection sensitivity to a level that suits your room. Too high gives false alarms, and too low misses events.
- Set active hours. For example, turn alerts on when you leave the house and off when you return.
- Choose the alert type. Some models offer extras such as pet, loud noise and baby cry detection.
- Check your phone's notification settings. The app needs permission to send alerts, and to run in the background.
- Test it. Walk in front of the camera and see whether you get an alert.
Too many alerts lead people to ignore them. Tune the settings until the alerts that arrive are worth reading.
Privacy modes
Some models have a physical lens shield, and others rely on app privacy features. Set a privacy schedule so the camera is not watching when you are at home, if that suits you. Keep in mind that the camera has to be powered on for the shield to work as designed.
Audio
Two-way voice lets you speak through the camera. Test the volume. Keep in mind that recording sound can raise additional privacy concerns, so consider disabling audio recording where it is not needed.
Part 5: Storage settings
Choose how and when the camera records.
- Continuous recording to the memory card uses more space, and gives full coverage.
- Event recording records only when detection triggers, which saves space.
- Loop recording overwrites the oldest video when the card is full, so you always have the most recent footage.
Check that the card is recognised, and look at the recordings now and then, to make sure they exist. Cloud storage, where offered, keeps copies off-site, and the terms depend on the region and change over time. Our storage guide goes into this in detail.
Part 6: Surviving Kenyan power cuts
The camera has no battery, so a power cut switches it off, and usually your router goes off too, so even a camera that stays powered cannot send alerts.
What you can do
- Use a small UPS for the router and the camera. A UPS gives you minutes to hours of backup, depending on its size and the load.
- Use a surge-protected extension so that returning power does not damage anything.
- Check that the camera reconnects after a cut. After the power returns, restart the router first, wait until it is working, and then check the camera in the app.
- Know the limits. A UPS will not run for a very long outage. For long outages, consider a larger backup, or accept that the camera will be offline.
- Do not rely on a camera for life-safety. A home camera is an aid, not an alarm system.
Part 7: Using the camera remotely
Remote viewing lets you check your home from anywhere. For it to work, both the camera and your phone need internet. The quality depends on your home upload speed, which is often much lower than the download speed on home connections. If remote video is poor, lower the quality setting.
Watch your data on mobile bundles. Streaming video uses data quickly, so use Wi-Fi where you can, and keep an eye on your allowance.
Part 8: Sharing access
You can share camera access with family members. Do it carefully.
- Share only with people you trust.
- Use their own accounts, instead of sharing your password.
- Review who has access now and then, and remove people who no longer need it.
- Tell household staff that cameras are in use in shared areas.
Part 9: Common problems and fixes
The camera will not connect during setup. Check the Wi-Fi password, make sure your phone is on the same band, move closer to the router, and restart both devices.
The camera goes offline often. The Wi-Fi signal is probably weak. Move the camera, add an extender or improve the router.
The picture is choppy or delayed. Lower the quality setting, reduce other uses of your internet, and check the signal.
No alerts arrive. Check the app's notification permission and background activity on your phone, and the camera's detection settings.
Too many false alarms. Lower the sensitivity, turn on human detection, avoid pointing the camera at windows and curtains, and set a schedule.
Night picture is washed out or bright in the centre. The camera may be too close to a wall or a window, or behind glass. Reposition it, and clean the lens.
The memory card is not recognised. Reinsert it, format it in the app, or try a different card. Unbranded cards often cause trouble.
Recordings are missing. Check the recording mode, the card's free space and whether the camera was powered.
The camera points in the wrong direction or drifts. Use the calibration or reset option in the app.
The camera does not reconnect after a power cut. Restart the router first, then the camera.
I forgot my account password. Use the account recovery process, with your email or phone number.
It gets warm. A little warmth is normal. Keep it ventilated, and do not cover it.
Part 10: Keeping it secure
- Use a strong, unique password and turn on any extra security.
- Keep the camera's software updated.
- Secure your Wi-Fi with a strong password.
- Do not share your account.
- Buy from a trusted seller, so the camera has not been tampered with.
- Reset the camera before you sell it or give it away.
Our privacy and security guide covers this in more depth.
A setup checklist
- I checked the Wi-Fi signal where the camera will go.
- I have a good-quality memory card in the right size.
- I have a plug that fits, and a surge-protected extension.
- I created a Xiaomi account with a strong password.
- The camera is added in the app and named by room.
- The picture, rotation, night mode and audio work.
- Detection and alerts are tuned.
- The camera is mounted high, away from windows and mirrors.
- I tested a recording and played it back.
- I have a plan for power cuts.
- People who live and work in the space know about the camera.
Improving Wi-Fi for the camera: your options
If the signal where the camera sits is weak, you have several options, in rough order of simplicity.
- Move the router. Placing it in a central, raised position often solves it for free.
- Move the camera. A spot closer to the router, or with fewer walls in between, may serve just as well.
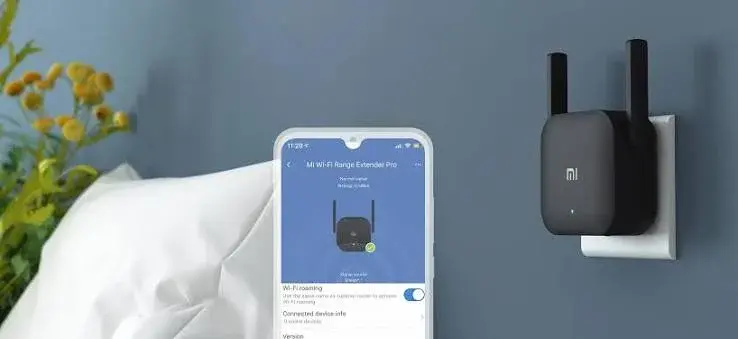
- Add a Wi-Fi extender, placed halfway between the router and the camera. It repeats the signal. We stock Xiaomi Mi Wi-Fi extenders, and can explain which suits your home.
- Use a mesh Wi-Fi system, which gives seamless coverage across a larger home.
- Run a cable to an access point near the camera. This gives the most stable connection.
- Upgrade the router, if it is old or overloaded.
- Reduce interference. Move the router away from microwaves and cordless phones, and change the Wi-Fi channel in a crowded building.
An extender repeats what it receives. If the signal at the extender's position is already weak, the extender will repeat a weak signal, so place it halfway, not in the dead spot.
Router settings that help cameras
You do not need to be a network engineer, but a few settings matter.
- Separate band names. If your router merges 2.4 GHz and 5 GHz under one name, some cameras struggle to join. Giving each band its own name, at least during setup, avoids confusion.
- Channel selection. In a crowded building, a less busy channel can improve stability.
- A fixed address for the camera. Some routers let you reserve the same internal address for a device. It can make a camera easier to find, and can reduce odd reconnect problems.
- Quality settings. Some routers let you prioritise devices. Giving priority to the camera can help if the household is busy.
- Security. Use WPA2 or WPA3 and a strong password.
- Restart schedule. A router that has run for weeks sometimes needs a restart. Some routers can restart on a schedule.
If you are not comfortable with these settings, ask us, or your internet provider.
Your first week with the camera
A camera is not a "set and forget" device in the first week. A short routine helps.
Day 1: Set up and test. Complete the setup, and test the picture, rotation, night mode and audio.
Day 2: Check the first night. Look at the night recordings in the morning. Is the picture clear? Is anything glowing or washed out?
Day 3: Tune detection. Review the alerts you received. Too many false alarms? Lower the sensitivity. Too few? Raise it.
Day 4: Check storage. View a recording from yesterday, and check the card's free space.
Day 5: Test the power cut plan. Briefly switch off the router and the camera, then restore them in the right order, and see that the camera reconnects.
Day 6: Check remote viewing. Watch the camera from mobile data, away from your home Wi-Fi, and check the quality and delay.
Day 7: Review. Do you have what you need? Adjust the position, the quality and the alerts, and note any problems to fix.
Planning for more than one camera
If you add a second or third camera, set up each one separately, and keep the following in mind.
- Give each camera a clear name, such as "Lounge", "Nursery" and "Front door".
- Check the Wi-Fi at each spot.
- Count your sockets. Each camera needs power, and a UPS must carry them all.
- Check your upload speed. More cameras mean more upload.
- Avoid overlapping views where you do not need them.
- Review alerts so that you are not buried in notifications.
Setting up in a small shop or salon
A shop is different from a home, because customers and staff are involved.
- Cover the entrance, the counter and the stock.
- Place the camera high, where it is hard to tamper with.
- Put up a notice that cameras are in use.
- Keep staff areas private. Do not point cameras into changing areas or toilets.
- Protect the footage. Use a strong password, and limit who can view it.
- Plan for power cuts with a small UPS for the router and the camera.
- Keep the lens clean. Dust and grease from the air blur the picture.
- Take advice on your legal duties as a business.
A night-view test
Do this on the first night, and again after you move the camera.
- Switch off the lights in the room.
- Open the live view on your phone.
- Check the picture: is it clear, or is there a bright patch in the centre, a glare or a haze?
- Turn the camera to different parts of the room, and check each view.
- Walk through the room, and see how the camera handles movement.
- Check for reflections from windows, mirrors and shiny floors.
- Adjust the position if needed, and test again.
If the centre of the picture is washed out, the camera may be too close to a wall or an object, because infrared light reflects back. Move the camera, or move the object.
A troubleshooting flow
When something is wrong, work through the flow.
Step 1: Is the camera powered? Check the cable, the socket and the adapter.
Step 2: Is the router working? Check another device on the same Wi-Fi.
Step 3: Is the signal strong at the camera? Check with a phone, and fix the signal if not.
Step 4: Is the app up to date, and is your phone online?
Step 5: Restart in order. Router first, then the camera, then the app.
Step 6: Check the camera in the app. Does it show online?
Step 7: Check settings. Quality, detection, notifications and recording mode.
Step 8: Check the card. Is it recognised, and does it have space?
Step 9: Reset the camera and set it up again, if nothing else works.
Step 10: Ask us. If the problem persists after these steps, bring the camera to the shop, or call Customer Relations on 0794 488 806 with your receipt.
A short glossary
2.4 GHz and 5 GHz: the two Wi-Fi bands. The first reaches further, and the second is faster at short range.
Extender: a device that repeats your Wi-Fi signal to cover more space.
Factory reset: returning the camera to its original settings.
Gimbal: the motorised mount that turns the camera's lens.
Mesh Wi-Fi: a set of linked units that give seamless coverage across a larger space.
UPS: a battery backup that keeps equipment running during a power cut.
A placement walkthrough for a typical two-bedroom flat
Imagine a two-bedroom flat in Nairobi, with the router in the living room, a nursery in the second bedroom and a front door opening into the living room. Here is how we would think about it.
- Living room. Put one camera on a high shelf in the corner opposite the front door. It sees the door and most of the room. Check that the window is not directly behind the door area, since daylight glare at the entrance will wash out the picture.
- Nursery. Put a camera high on a shelf or ceiling mount, looking down at the cot from a distance. Keep cables well away from the cot. Check that Wi-Fi reaches the room, and add an extender if it does not.
- Front door. The living room camera covers it. A separate camera is rarely needed indoors.
- Kitchen. Skip it unless you have a specific need, since steam and grease are hard on electronics.
- Test each position by watching the live view for a few minutes during the day and again at night.
Three principles guide every placement: high, away from glass, and inside good Wi-Fi range.
Cable management and mounting tips
- Keep cables short and tidy. Use clips or a cable channel along the wall, so that nothing dangles.
- Keep cables out of reach of children and pets.
- Use the surge-protected extension at the wall, and keep it off the floor where it could get wet.
- Secure the mount properly. If you drill into a wall, check for pipes and wires first, or ask a technician.
- Do not overload sockets. Several adapters on one extension can overheat.
- Label your cables if you have several cameras, so that you can find the right one.
A monthly maintenance routine
Spend five minutes each month.
- Check that the camera is online in the app.
- Play back a recent recording to confirm that the card is working.
- Check for a software update and install it.
- Clean the lens.
- Check the alerts and adjust the sensitivity if needed.
- Review who has access to the camera.
- Check the cables for damage.
A short routine catches small problems before they become failures.
Notification etiquette
Alerts are useful, but too many make people ignore them.
- Use human detection, so that you are told about people rather than shadows.
- Set quiet hours for times when you are home.
- Share alerts with only those who need them.
- Check your phone's settings, so that important alerts are not silenced.
- Turn off alerts for rooms you do not need to watch.
Moving house or moving the camera
If you move the camera to another room, or another home, you may need to reconnect it to Wi-Fi. In the app, remove the old connection, move the camera, power it on and add it again, following the same steps as the first time. If you move to a new home with a new router, you will need the new Wi-Fi name and password. Check the signal in the new location before you mount the camera.
Voice assistants and other devices
Some models list compatibility with Alexa and Google Assistant, which require compatible devices. The C400 also lists compatibility with the Mi Smart Clock, sold separately. Voice features depend on your devices, your language and your region, and we do not promise any particular feature. Ask us to confirm what works with your setup.
When to ask for help
Some problems are quicker to solve in person. If the camera keeps going offline after you have improved the Wi-Fi, if it will not power on, if the lens makes grinding noises while turning, or if the app cannot find it after a reset, bring it to the shop on Taveta Road with your receipt and your phone. We can test the camera on our network, and tell you whether the fault is in the camera, the router or the setup.
Remember that a good setup is never finished on day one. Revisit the position, the alerts and the storage after a month, and adjust them as you learn how your home behaves.
Frequently asked questions
Do I need to be home to set it up?
No, but you need your phone, your Wi-Fi password and a power socket.
How long does setup take?
About ten minutes for most people.
Can I set up the camera at the shop and carry it home?
Yes. We can set it up with you at the shop, and you can move it to your home and connect it to your Wi-Fi.
Do I have to use cloud storage?
No. A memory card works without it.
Can I add more cameras later?
Yes. The app lets you add several cameras, and each one needs its own power and Wi-Fi.
Can the camera work on a mobile hotspot?
It can connect to a hotspot or a 4G or 5G home router, but watch your data, and expect more variation in quality.
Will it work with Alexa or Google Assistant?
The manufacturer lists compatibility with compatible devices for some features. We confirm for your setup.
Need help?
If you buy from City Gadgets Kenya, we can help you set up at the shop or by phone and video. Call Sales on 0745 575 931, write to sales@citygadgetskenya.co.ke or visit us at New Alnoor Exhibition, Shop 7, Second Floor, Taveta Road, Nairobi CBD, open Monday to Friday 9am to 7pm and Sunday 11am to 4pm, closed Saturday. For help after purchase, Customer Relations is on 0794 488 806. We accept M-Pesa.